Quality Assurance in Web3: Setting Up for Testing

Testing in Web3 development requires a different approach than traditional software testing. One of the first steps is ensuring you have the necessary gas tokens to interact with smart contracts and execute transactions. This blog article will guide you through obtaining gas tokens, bridging them across different EVM chains, and creating ERC20 tokens for testing purposes.
What Are Testnets and Why Are They Necessary?
Testnets are blockchain networks designed for testing without using real assets. They function like mainnets but use test tokens with no monetary value, allowing developers and QA teams to experiment safely before deploying on a live network.
Using testnets helps identify bugs, optimize gas costs, and ensure smart contract functionality without financial risk. Popular Ethereum testnets include Sepolia and Holešky, while other EVM chains have their own test networks, such as Arbitrum Sepolia and Optimism Sepolia.
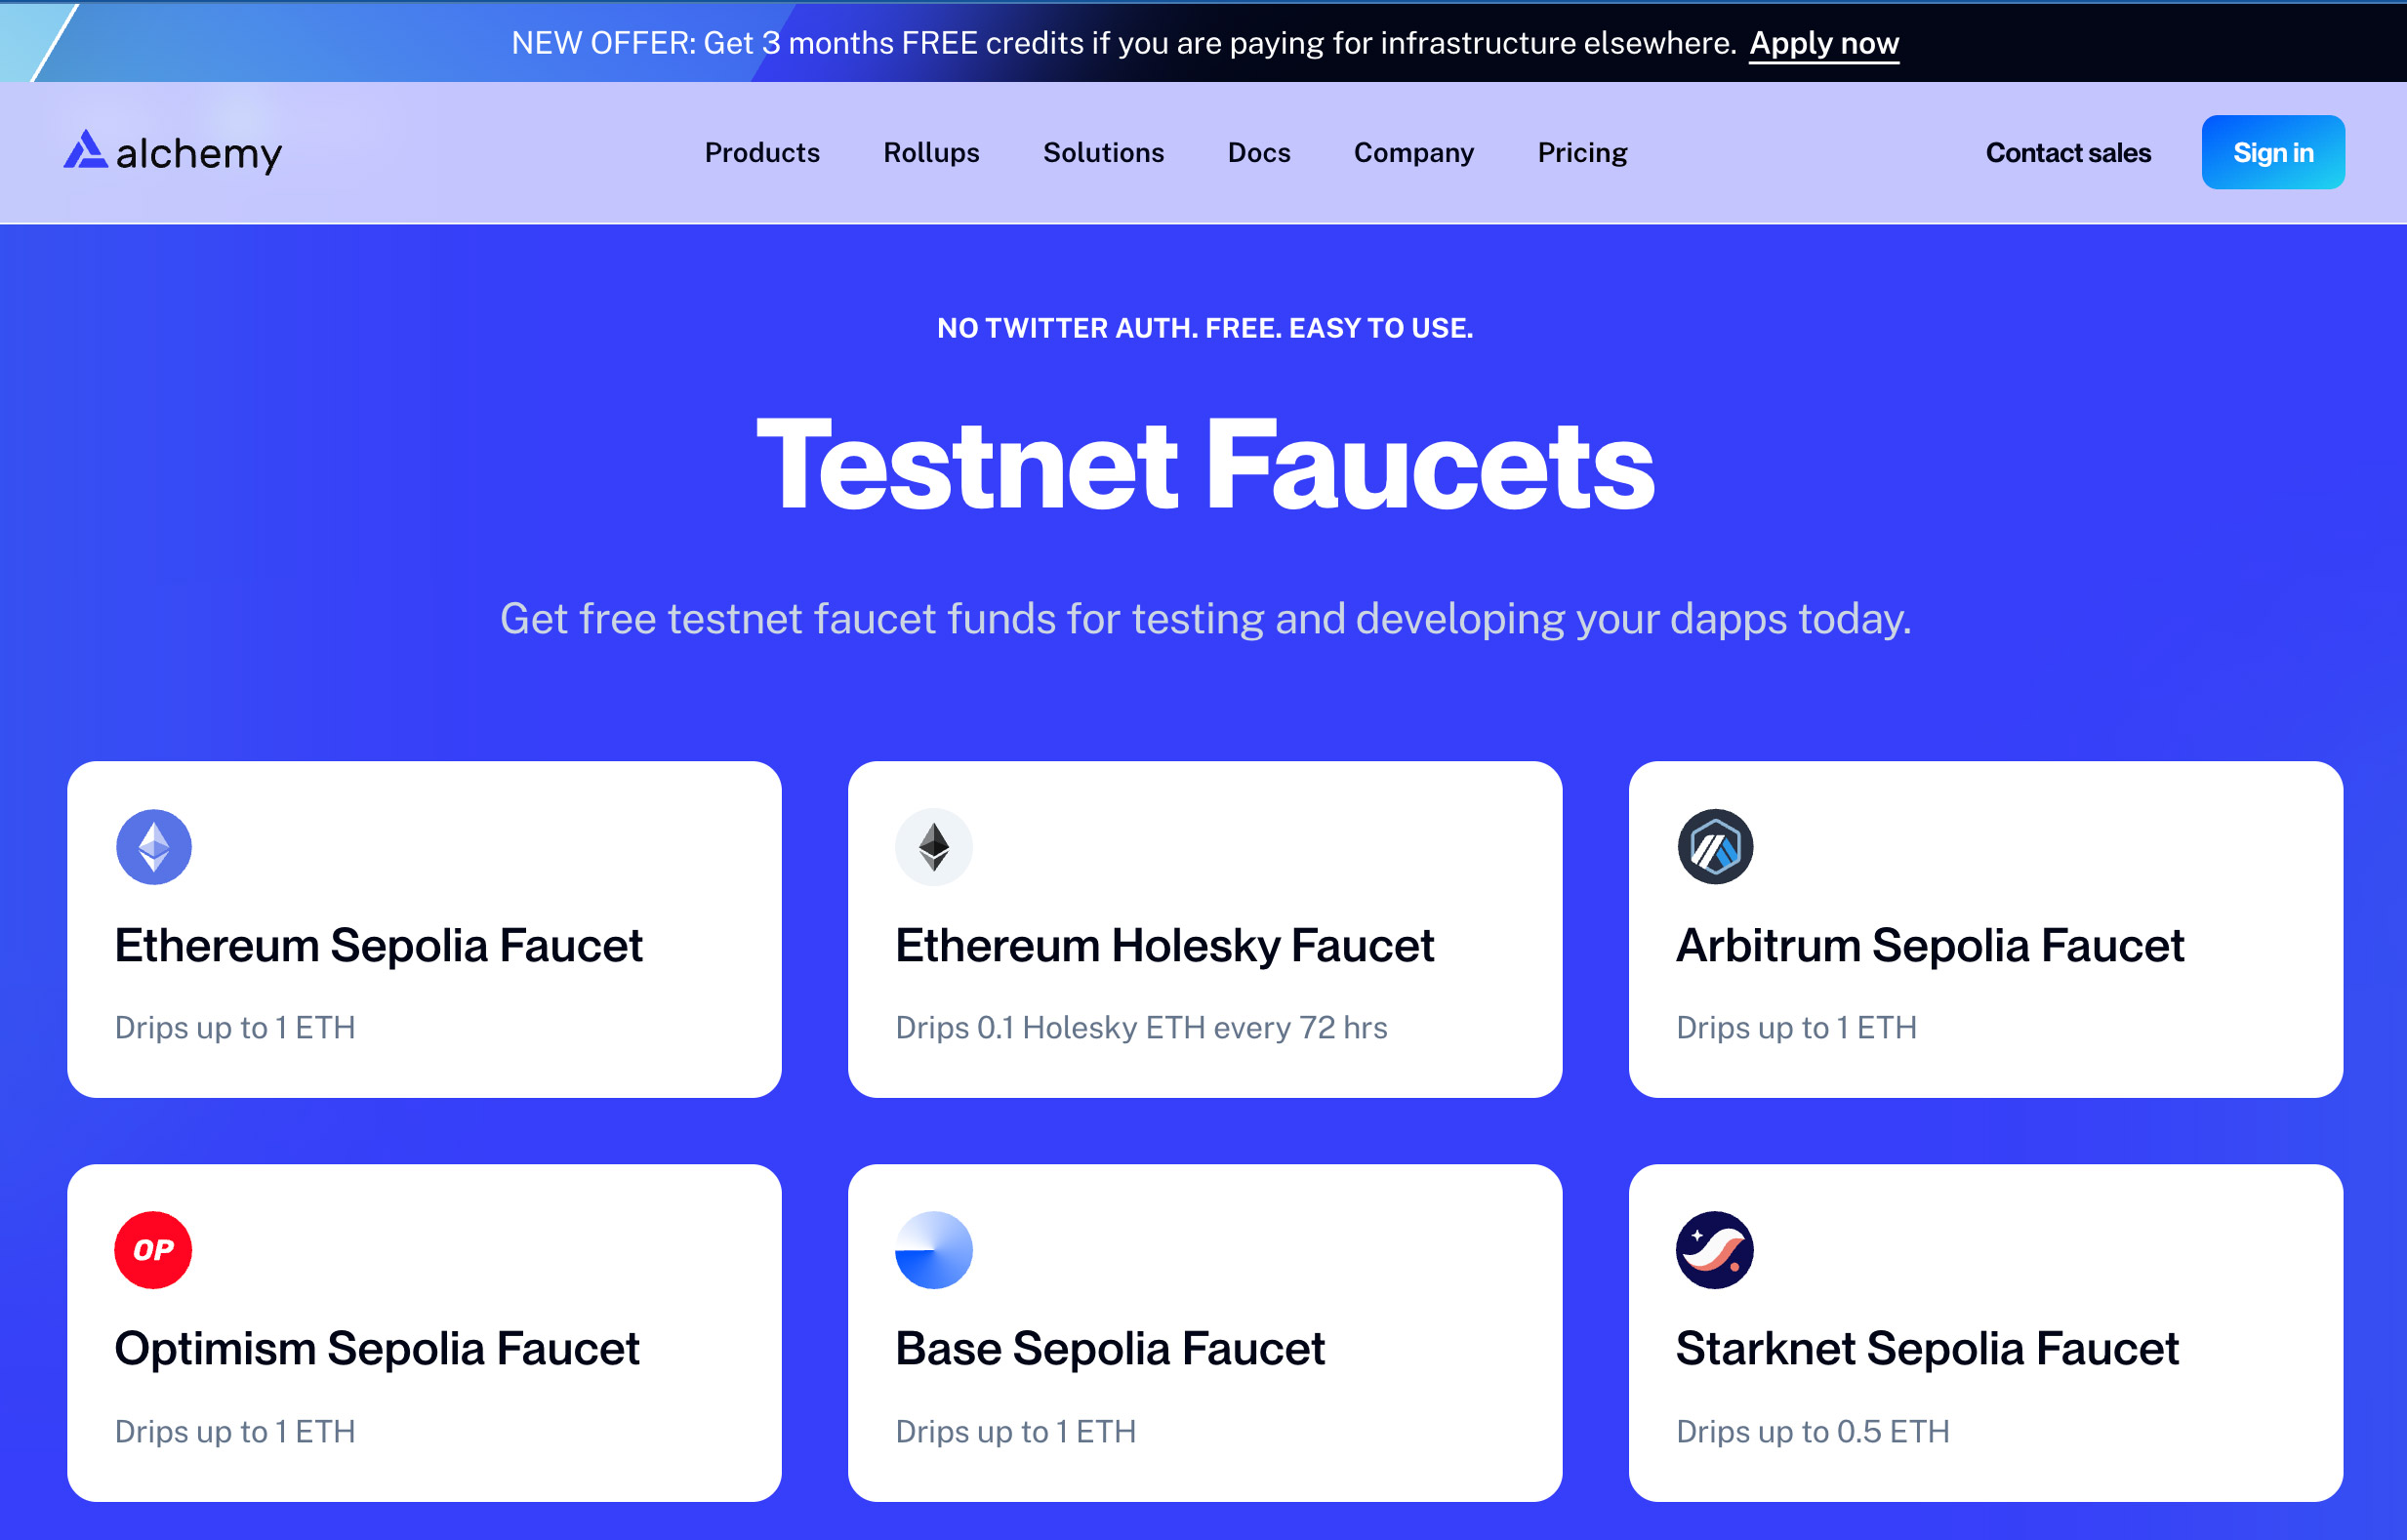
1. Getting Gas Tokens for Testing
Ethereum transactions require ETH to cover gas fees. If you're testing on mainnet, you'll need real ETH, but for testnets, you can get free ETH from faucets. Here's how:
Ethereum Testnets
- Sepolia: Use Alchemy Faucet or Infura Faucet.
- Holešky: Currently supported by Google Cloud Web.
2. Bridging Gas Tokens to Other EVM Chains
Once you have ETH, you might need to bridge it to another network like Arbitrum, Optimism, Base, or Polygon. Bridges allow you to move ETH from Ethereum mainnet to Layer 2s or sidechains.
Popular Bridges for ETH and Gas Tokens
- Arbitrum Bridge - Move ETH from Ethereum to Arbitrum.
- Optimism Gateway - Bridge ETH to Optimism, Base, Mode, and the OP Superchains.
- Polygon PoS Bridge - Bridge ETH to Polygon Amoy.
Bridging Process
- Connect your wallet to the bridge UI.
- Select the network you're bridging from (Ethereum) and to (e.g., Arbitrum).
- Choose the asset (ETH) and the amount.
- Confirm and approve the transaction.
- Wait for confirmation, which varies depending on the chain.
3. Creating ERC20 Tokens for Testing
For Web3 QA, you might need ERC20 tokens to test dApps, liquidity pools, or token-based contracts. Below is a simple step-by-step guide to deploying a test ERC20 token.
Step-by-Step Guide to Deploying an ERC20 Token
Step 1: Use Remix IDE
- Go to Remix Ethereum.
- Create a new Solidity file (e.g.,
TestToken.sol).
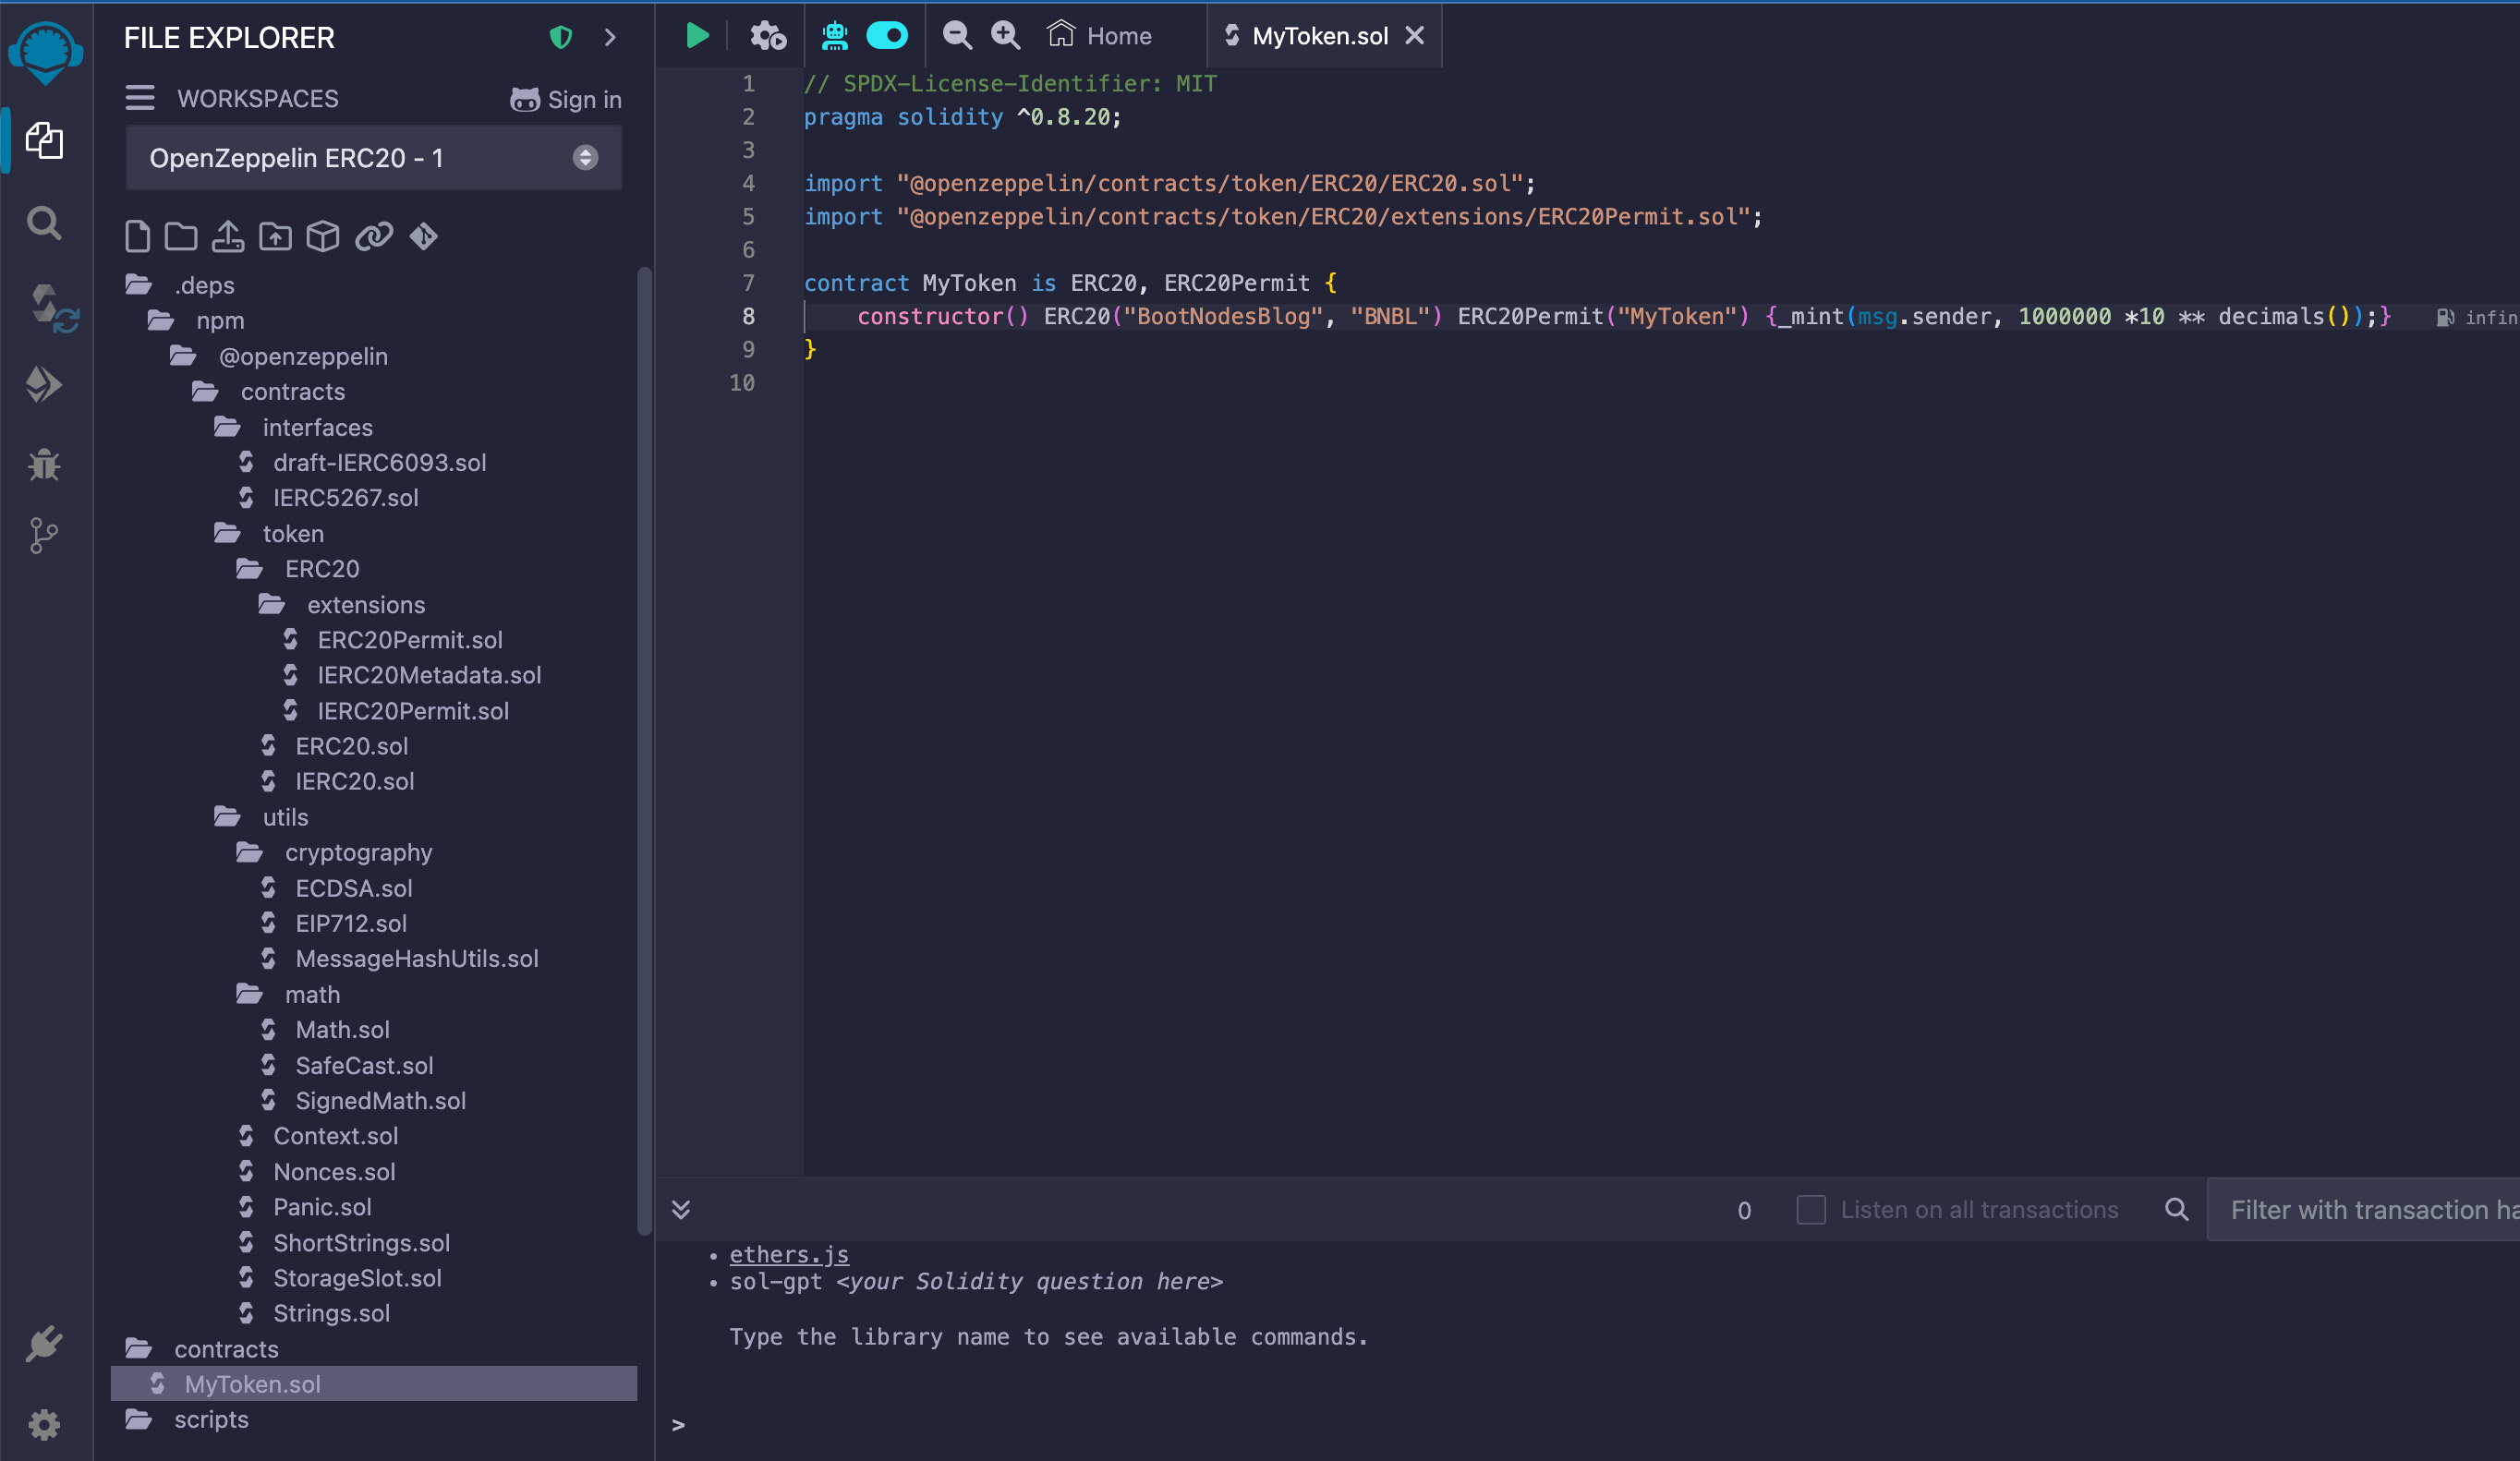
Step 2: Paste the ERC20 Contract Code
// SPDX-License-Identifier: MIT
pragma solidity ^0.8.19;

import "@openzeppelin/contracts/token/ERC20/ERC20.sol";

contract TestToken is ERC20 {
    constructor() ERC20("TestToken", "TTK") {
        _mint(msg.sender, 1_000_000 * 10 ** decimals());
    }
}
Step 3: Compile the Contract
- In Remix, navigate to the Solidity Compiler tab.
- Select 0.8.19 or a compatible compiler version.
- Click Compile TestToken.sol.
Step 4: Deploy the Contract
- Go to the Deploy & Run Transactions tab.
- Select the environment:
- Injected Provider (MetaMask) to deploy on the network currently set in your wallet.
- Remix VM for local testing.
- Deploy the contract.
- Once deployed, you'll see your token contract under Deployed Contracts.
Step 5: Interact with the Token
- Use MetaMask to add the token by entering the contract address.
- Mint more tokens by modifying the
_mintfunction if needed.
Verifying Your Token
You can verify your recently created token by following this process: Verify and publish smart contracts on Etherscan.
By following these steps, you ensure a smooth testing process in Web3, whether you're working with gas tokens, bridges, or test tokens. Proper QA helps mitigate issues before deployment, saving costs and reducing potential failures in production.
Related articles
- Web3 Testing: Make Your Dream DApp a Reality with This Guide
- How I Test Web3 Products Before Release: A QA Engineer's Perspective